What Size Jump Starter Do I Need? A Complete Guide for Choosing the Right Car Battery Booster

 USD
English
A check engine light should be cleared only after you read the diagnostic trouble codes, find the cause, and complete the repair. The cleanest method is to record the codes and freeze-frame data with an OBD-II scan tool, repair the fault, clear the stored information, and then confirm that the light stays off while the vehicle's readiness monitors run again.
If the light is flashing, stop treating this as a reset job. Reduce load, pull over safely, shut the engine down, and arrange diagnosis. A flashing malfunction indicator lamp can indicate a misfire severe enough to threaten the catalytic converter. If the light is steady and the vehicle otherwise runs normally, you usually have time to read the codes before deciding what to do.
This guide uses “remove” and “turn off” to mean clearing the warning after a repair. It does not mean removing the bulb, covering the light, cutting a wire, or defeating an emissions system.
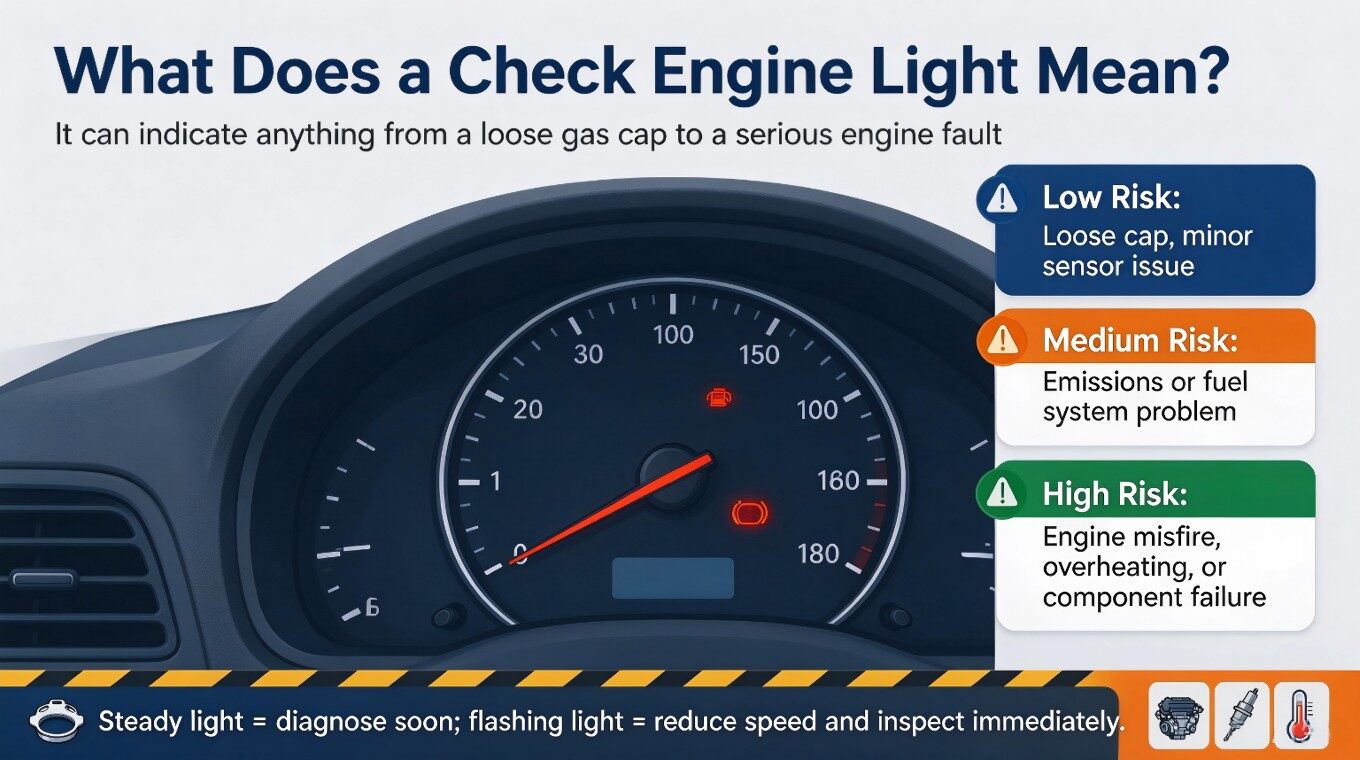
Four definitions to know before touching anything
- Check Engine Light (CEL):the dashboard warning commonly used for the powertrain malfunction indicator lamp, or MIL.
- OBD-II:the standardized onboard diagnostic system used to monitor emissions-related vehicle systems and provide diagnostic data through a data link connector.
- Diagnostic Trouble Code (DTC):a standardized five-character identifier stored by the vehicle computer when it detects a qualifying fault.
- Battery reset:an interruption of the vehicle's 12-volt power intended to reset electronic modules; it is not a repair and may erase learned settings or other stored data.
“Service Engine Soon” needs one more check. On some vehicles, that wording is the MIL. On others, a separate “maintenance required” or service reminder tracks time or mileage. The owner's manual, not the wording alone, tells you which system you are looking at.
First decide whether the light is safe to diagnose at home
|
What you see |
What it may mean |
What to do now |
Clear it now? |
|
Light flashes while the engine runs |
Active fault that may damage the catalytic converter, often a severe misfire |
Ease off the throttle, stop safely, and seek diagnosis |
No |
|
Light is steady; vehicle drives normally |
Stored emissions or powertrain fault |
Read all codes and inspect the obvious causes |
Not before recording data |
|
Light is steady with shaking, smoke, overheating, oil-pressure warning, or major power loss |
Possible engine or safety-critical problem |
Stop safely and arrange professional help |
No |
|
Light came on after refueling |
Loose, damaged, or incorrectly fitted fuel cap is possible on vehicles that monitor the evaporative system |
Stop, inspect the cap and seal, and tighten it as the manual specifies |
Let the vehicle verify the repair first |
|
Light is off but a code remains |
Pending, history, or permanent information may still be stored |
Check code status and readiness |
Do not assume the car is inspection-ready |
The warning light is a symptom, not a diagnosis. A code such as P0301 points toward a detected misfire on cylinder 1, but it does not prove that a particular part is bad. Ignition, fuel, compression, wiring, and air leaks can lead to similar symptoms. Parts swapping before testing gets expensive quickly.
Common DTC families and what their first character means
|
First character |
System family |
Example |
What the code does not prove |
|
P |
Powertrain |
P0301 cylinder 1 misfire detected |
It does not identify the failed part by itself |
|
B |
Body |
Manufacturer- and model-dependent |
It does not necessarily relate to the engine light |
|
C |
Chassis |
Manufacturer- and model-dependent |
It does not automatically mean the vehicle is unsafe to move |
|
U |
Network communication |
Module communication fault |
It does not prove that the named module needs replacement |
Most basic emissions-related check engine work starts with P-codes, but save every code before clearing anything. A useful record includes the exact code, whether it is current, pending, history, or permanent, and any available freeze-frame values such as engine speed, coolant temperature, load, and vehicle speed.
How to clear the codes of a check engine light with OBD-II
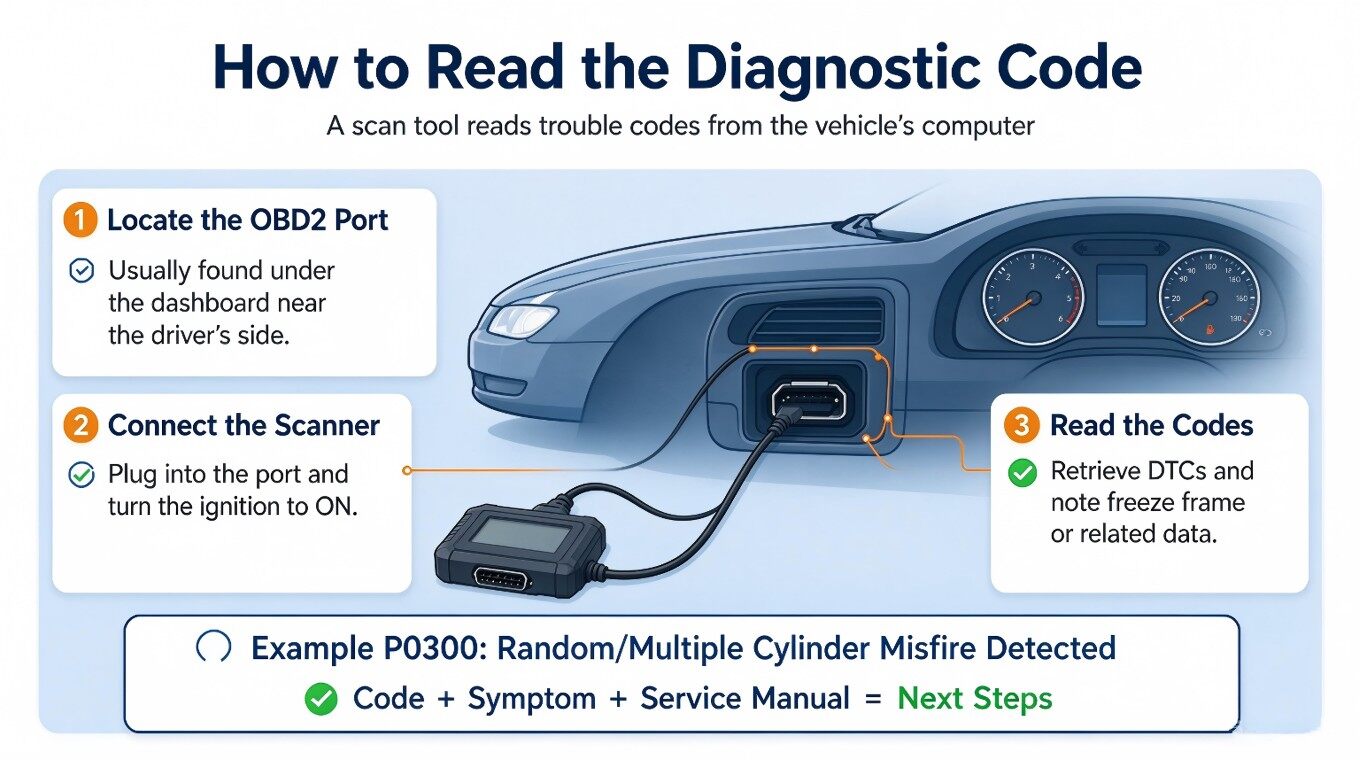
For most 1996-and-newer U.S.-market passenger vehicles, a compatible OBD-II scan tool is the least disruptive way to clear repair-related codes. Tool menus differ, so use the vehicle manual and the tool instructions together.
- Park on level ground, select Park or Neutral, set the parking brake, and switch off accessories.
- Find the 16-pin data link connector, usually under the driver's side of the dashboard. Do not force a plug that does not align.
- Connect the tool with the ignition off unless its instructions specify otherwise.
- Turn the ignition to the position requested by the tool. Many tools ask for key-on, engine-off during the first scan.
- Read stored, pending, and permanentcodes. Save the freeze-frame data before doing anything else.
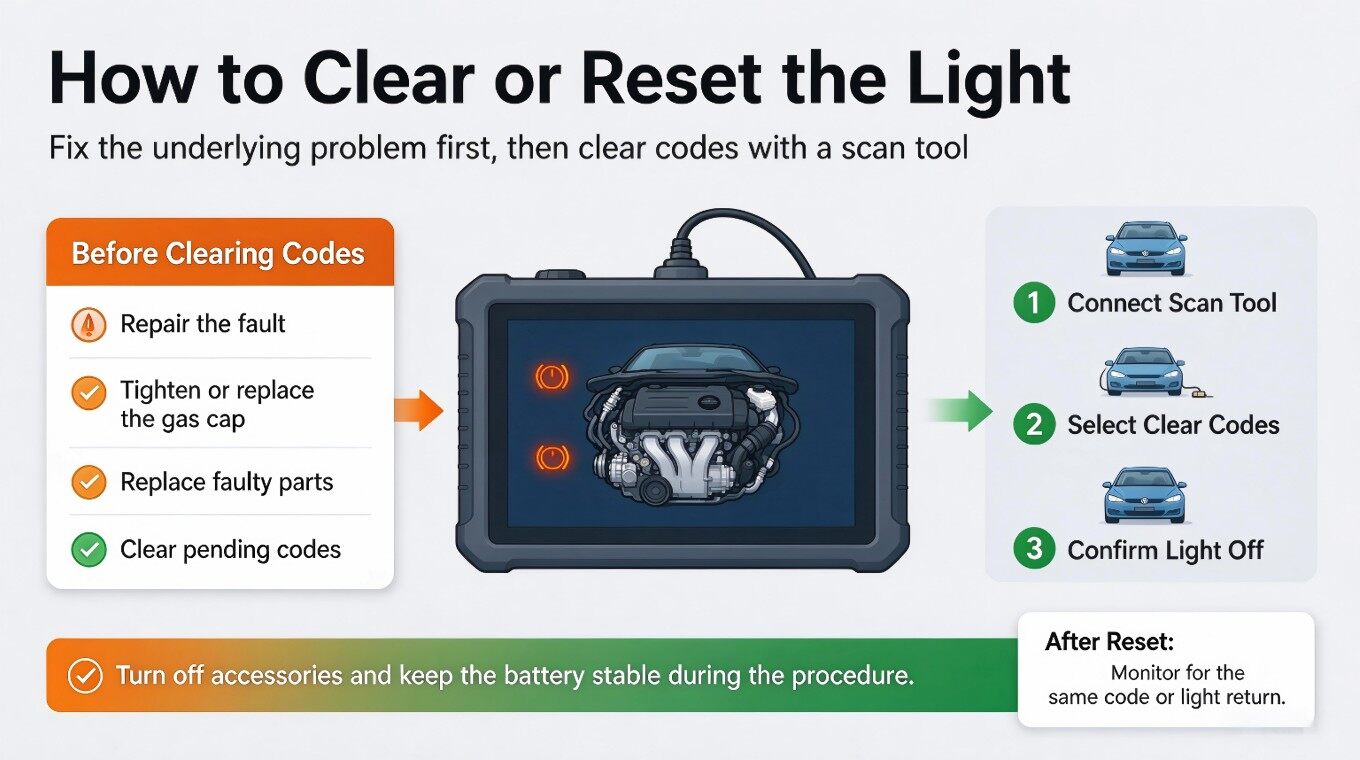
- Diagnose and repair the cause. Tightening a loose fuel cap may be enough for an evaporative leak caused by the cap; a misfire or sensor circuit fault needs a proper test process.
- Use the clear or erase command only after the repair. Confirm the prompt deliberately.
- Cycle the ignition as directed, start the engine, and scan again.
- Check MIL command status and readiness monitors. A dark dashboard light alone does not confirm that every monitor is complete.
Do not clear the code before a shop appointment merely to see whether it returns. That removes evidence the technician could use and may reset readiness monitors to “not ready.”
How to reset check engine light without disconnecting battery
Use the scan-tool method above or allow the OBD-II system to turn the light off after it verifies a successful repair. Both approaches preserve the physical battery connection. The first gives you control over when non-permanent codes are cleared; the second retains diagnostic history until the vehicle's own criteria are met.
A practical no-disconnect sequence is:
- Record every DTC and freeze-frame value.
- Repair the actual fault.
- Clear repair-related non-permanent codes with a compatible scan tool, if the repair procedure calls for it.
- Restart and scan for immediate returns.
- Drive according to the exact drive-cycle instructions in the owner's or service manual.
- Recheck readiness before an emissions inspection.
There is no universal “drive 50 miles” rule. Monitor conditions vary by vehicle and may depend on coolant temperature, fuel level, ambient temperature, speed, idle time, and a cold start. The Delaware Division of Motor Vehicles notes that many vehicles become ready after a few days of normal driving that includes highway and stop-and-go use, but it also directs owners to the manufacturer or a qualified technician for vehicle-specific instructions.
How to clear check engine light after the repair
Choose the method based on what you need to preserve and what your vehicle manual permits.
|
Method |
Best use |
Main advantage |
Main drawback |
Readiness effect |
|
OBD-II clear command |
Repair is complete and diagnostic data is already saved |
Controlled and easy to verify with a rescan |
Requires a compatible tool |
Usually sets applicable monitors to not ready |
|
Natural self-clear |
Fault is repaired and the vehicle can complete its monitor logic |
Preserves battery connection and avoids a manual reset |
Timing varies; the light may stay on for several trips |
Monitors continue evaluating normally |
|
Battery disconnect |
Only when the vehicle service information permits it |
May reset some module memories |
Can erase settings, adaptations, and diagnostic evidence; may trigger relearn procedures |
Often resets applicable monitors to not ready |
|
Fuse removal |
Only when the exact service procedure identifies the correct circuit |
Can isolate a specified circuit |
Wrong fuse or procedure can create new faults or disable systems |
Vehicle-specific |
|
Shop-level diagnostic reset |
Complex, recurring, hybrid/EV, or manufacturer-specific faults |
Access to guided tests and enhanced-module data |
Costs more than a basic code read |
Depends on the procedure |
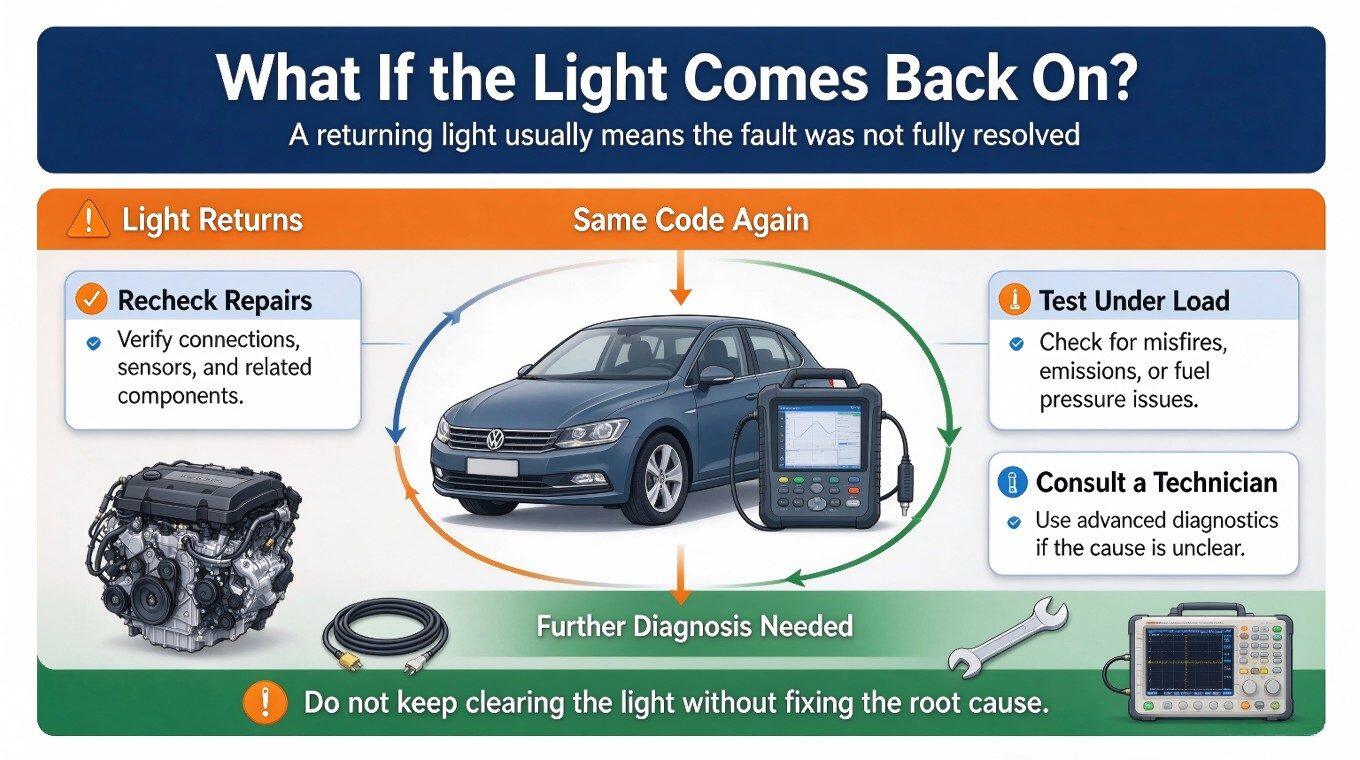
If a code returns immediately, do not keep erasing it. An immediate return often means the electrical or mechanical fault is still present. If it returns only after a particular trip, note the operating conditions and use that information in the next diagnostic step.
How to clear a check engine light naturally
After a confirmed repair, the vehicle may turn the MIL off once its OBD logic sees enough successful monitoring results. The number and type of trips are not universal. Leave the battery connected, drive normally within legal and safe limits, and watch the light.
Natural clearing is reasonable after a simple verified correction, such as properly refitting an intact fuel cap. It is not a reason to ignore a flashing light, rough running, overheating, or a recurring code. Scan the car again even if the light goes out; pending, history, readiness, or permanent information may explain what happened.
How to erase check engine light data without erasing the diagnosis
You cannot erase a code and keep all of the evidence attached to it. Before issuing a clear command, make a small diagnostic record:
|
Item to save |
Example format |
Why it matters |
|
DTC and status |
P0301, stored and pending |
Distinguishes a confirmed fault from one still being evaluated |
|
Freeze-frame engine speed |
2,140 rpm |
Shows when the fault set |
|
Coolant temperature |
89°C / 192°F |
Helps distinguish cold-start and warm-engine behavior |
|
Vehicle speed |
55 mph / 89 km/h |
Connects the fault to idle, city, or highway operation |
|
Fuel level |
42% |
Some evaporative monitors run only within a specified fuel range |
|
Date and odometer |
2026-10-09, 84,220 miles |
Gives a repair and recurrence timeline |
The numbers in the example are a record format, not target values. Use the values your vehicle reports. A photo of the screen is better than trusting memory.
Permanent DTCs are different. California's Bureau of Automotive Repair explains that a permanent DTC cannot be erased with a scan tool or by disconnecting the battery. The OBD-II system clears it only after verifying that the previously identified defect is no longer present. That is one reason a dashboard light can be off while diagnostic information still exists.
How reset check engine light searches can lead to the wrong shortcut
Search results often put “reset” ahead of “repair.” Reverse that order. The useful workflow is read → record → diagnose → repair → clear if required → verify.
Avoid these shortcuts:
- Do not remove the warning bulb, cover it, cut a wire, or alter the instrument cluster.
- Do not disconnect the battery before saving codes and freeze-frame data.
- Do not install a part solely because its name appears in a code description.
- Do not clear codes immediately before an emissions test. The light may be off while required monitors remain incomplete.
- Do not use a fuse-removal procedure copied from a different year, engine, or model.
- Do not work around a running engine, cooling fan, high-voltage hybrid component, or hot exhaust unless the service procedure requires it and you have the right training.
How to disconnect engine light: what this phrase should mean
You should not disconnect the check engine light itself. If the phrase means disconnecting the 12-volt battery to reset the vehicle computer, first check the owner's manual and service information. Some vehicles require radio codes, window or steering-angle relearns, throttle adaptation, or other steps after power is restored. Hybrids and electric vehicles also have high-voltage systems that are outside the scope of a basic 12-volt reset.
Where the manufacturer permits a 12-volt battery disconnect, record diagnostic data first, switch the vehicle fully off, keep the key away from the car, and follow the specified terminal order and waiting period. Generic timing advice is not a substitute for model-specific service instructions.
How to remove check engine warnings without hiding a fault
“Remove” should mean correcting the cause and verifying the repair. It should never mean defeating the indicator. Start with cheap, visible checks that fit the code and symptoms: a fuel cap that is loose or has a damaged seal, a disconnected intake hose, a connector left unplugged after service, obvious wiring damage, or a weak 12-volt supply that caused communication faults.
Visual checks do not replace testing. If the code indicates a circuit fault, check the correct wiring diagram and measured voltage, resistance, or waveform as the service procedure directs. If it indicates a performance fault, look at live data and mechanical condition before buying parts.
How to remove check engine light after a dead battery event
A weak or disconnected 12-volt battery can leave you with low-voltage or communication codes, and it can also prevent the engine from starting long enough to perform a useful scan. Restore stable 12-volt power first. If the battery is discharged but otherwise serviceable and the vehicle manual permits jump starting, a portable jump starter can supply the short burst of current needed to crank the engine; it does not repair the battery or clear the cause of the light.
For a simple jump-only option, the Eigotrav PD-J220 6000A jump starter is listed for 12-volt vehicles and does not make the diagnostic decision for you. The Eigotrav PD-F130 9000A jump starter with air compressor adds roadside functions for drivers who also want inflation support. Match any starter to the voltage, fuel type, engine size, temperature, and instructions for your vehicle.
After the engine starts, check charging voltage by the procedure in the service manual, scan all modules, and save the codes. Repeated no-starts or a battery that will not hold charge call for battery and charging-system tests, not repeated resets.
How to turn off engine light when it returns immediately
An immediate return narrows the problem. Re-scan without clearing again and compare the code status with the original record.
- A circuit code that returns at key-on may point to an open circuit, short, disconnected sensor, or module communication issue.
- A misfire code that returns at idle may need ignition, injector, vacuum-leak, or compression testing.
- An evaporative code may require a complete monitor run before it returns, so an instant clear proves little.
- Multiple unrelated low-voltage or communication codes can justify testing the 12-volt battery, terminals, grounds, and charging system before replacing modules.
If you used an emergency power source to start the vehicle, keep the roles separate: the jump starter restores cranking support; the scan and repair process addresses the warning light.
How to turn off service engine light correctly
First identify the indicator from the owner's manual. If “Service Engine Soon” is the vehicle's MIL, use the same read-diagnose-repair-verify process described here. If it is a maintenance reminder, follow the maintenance schedule and the manufacturer-specific reset procedure only after the service is completed.
Do not assume that a generic pedal sequence or button combination applies to your car. A maintenance reminder reset may use steering-wheel controls, a dashboard button, a touchscreen menu, or a scan tool. Resetting the reminder without doing the oil change or other scheduled work only hides the schedule from the driver.
How to clear engine light data and check readiness
Clearing codes can set supported emissions monitors to “not ready.” Readiness means the OBD system has completed the self-test for a monitored emissions system; it does not mean every component is new or perfect.
You can summarize progress with a simple calculation:
Readiness completion rate = ready supported monitors ÷ total supported monitors × 100
If a vehicle supports eight relevant monitors and seven report ready:
7 ÷ 8 × 100 = 87.5%
That percentage is only a tracking aid. It is not a universal pass rule. Inspection programs differ by jurisdiction and model year. Check the current rule where the vehicle will be tested. Delaware DMV, for example, warns that a recent battery disconnect or scan-tool clear can set components to not ready and that the vehicle may need a manufacturer-specific drive cycle.
How to shut off check engine light before an emissions test
Do not clear it just before the test. A freshly cleared vehicle may show no active light yet still be rejected because the readiness monitors have not completed. Repair the fault early enough to run the specified drive cycle, then check three things before visiting the inspection lane:
- The MIL illuminates briefly during the key-on bulb check.
- The MIL is not commanded on while the engine is running.
- The required readiness monitors satisfy your jurisdiction's rule.
Permanent codes may also matter. California's current OBD test reference states that certain model years are subject to a permanent-code check and explains the conditions used in that program. Local rules may differ, so use the inspection authority for the state or country where the vehicle is registered.
How do I reset check engine light if the vehicle will not start?
Start with electrical safety and stable 12-volt power. Check that the battery terminals are secure and free of obvious corrosion. If the battery is discharged, follow the vehicle's approved jump-start procedure. The Eigotrav jump starter collection includes portable options intended to supply starting current for compatible 12-volt vehicles.
Once the vehicle can communicate reliably, scan before clearing. A no-start can result from much more than a low battery, and a portable power source cannot correct fuel, ignition, immobilizer, compression, timing, or control-module faults. If the engine does not crank after one or two procedure-compliant attempts, stop and diagnose rather than overheating cables or the starter.
For connection and storage basics, see Eigotrav's guide to how jump starters work. Always give the vehicle manual and the product instructions priority.
Frequently Asked Questions
How to clear check engine light without a scan tool?
Repair the fault and allow the OBD system to verify the correction. The light may turn off on its own after the necessary monitor conditions are met. Battery disconnection is not a universal substitute: it can erase evidence and reset readiness, and it may require model-specific relearns.
How to remove check engine without replacing parts first?
Read the codes, save freeze-frame data, and test the suspected system. A loose fuel cap, damaged connector, intake leak, wiring fault, low 12-volt voltage, or mechanical problem may produce a code without proving that the named sensor needs replacement.
How to clear a check engine light if it is flashing?
Do not clear it. Reduce engine load, stop safely, and arrange prompt diagnosis. Continuing to drive through an active severe misfire can damage the catalytic converter and turn a manageable repair into a much more expensive one.
How to turn off engine light after tightening the fuel cap?
Inspect the cap and seal, tighten it as the manual specifies, and drive normally. The evaporative monitor must run under its required conditions before the vehicle can confirm the fault is gone. If the light remains on or returns, scan the vehicle rather than assuming the cap was the only cause.
How to erase check engine light permanently?
You cannot make a real fault disappear permanently with an erase command. Fix the cause and let the vehicle verify the repair. Permanent DTCs cannot be manually erased with a scan tool or battery disconnect; the OBD-II system clears them after its criteria are satisfied.
How to turn off service engine light after maintenance?
Confirm whether the lamp is a malfunction indicator or a maintenance reminder. Complete the required maintenance, then follow the exact reset procedure in the owner's manual. Do not use a generic button or pedal sequence from another model.
A reset checklist you can use in the driveway
- [ ] Confirm whether the light is steady or flashing.
- [ ] Stop if there are severe symptoms or another critical warning.
- [ ] Read the owner's manual for the exact indicator.
- [ ] Scan stored, pending, and permanent codes.
- [ ] Save codes and freeze-frame data.
- [ ] Diagnose and repair the cause.
- [ ] Clear non-permanent codes only if the repair procedure calls for it.
- [ ] Restart and rescan for immediate returns.
- [ ] Complete the model-specific drive cycle.
- [ ] Confirm readiness before an emissions test.
- [ ] Keep the diagnostic record with the repair date and odometer.
A reset is the last step, not the first. If a weak battery prevents cranking or communication, restore safe 12-volt power, then return to the diagnostic sequence. Drivers building a roadside kit can compare Eigotrav's jump starters and choose by vehicle voltage, fuel type, engine size, and the manufacturer's published compatibility limits. The warning light still needs its own diagnosis.
Subscribe To Our Newsletter
You Can Get The News Of Our Products
SIGN UP
To be the most trusted mobile energy companion worldwide — making every drive, every trip, and every adventure worry‑free.
📮support@eigotrav.net
Payment Methods